
If you are not familiar with chess notation and checkmate, please refer to this article and this one before reading the below article.
You’ve probably heard strong chess players saying, “It’s a win for White!” or “This position is a draw!” when they are asked about the evaluation of a particular position. Have you ever wondered how they can do it? The answer is simple: ‘They know the theory involved in the position!’
Loads of chess positions and ideas have been studied and analyzed by great players, adding them to the well-established chess knowledge over decades, termed as ‘chess theory.’ The ever-evolving chess theory is a must for players aiming to improve their game.
Let’s discuss the ‘theory’ behind two of the most elementary checkmates in chess:
- Checkmating a lone king with the queen.
- Checkmating a lone king with the rook.
There are multiple ways to achieve both the checkmates. In this article, we are discussing an easy-to-learn method for the first one.
Checkmating with the Queen
Checkmating a lone king with the queen is relatively simple and straightforward. For the sake of explanation, let’s consider White to be the side with the queen.
The steps involved in the mate are as follows:
- Decide on a corner of the board to drive the Black king to (It’s easier to mate the king when it’s in a corner). You can deliver a faster checkmate if the corner decided is the closest to the Black king.
- Create a box with the queen around the Black king so that the ‘corner’ now becomes a corner of the newly created box.
- Shrink the box by moving the queen closer to the Black king, keeping the ‘corner’ intact.
- This ‘shrinking the box’ method should be continued till the Black king is restricted to just ‘two’ squares in the ‘corner’ (If it was just one square, then it would be a stalemate).
- Now it’s time to bring your king into the action. Bring your king to the square closest to the Black king such that the file/rank in which the queen is on is in the middle of the files/ranks in which the kings are on.
- Deliver the final checkmating blow.
Note: Avoid unnecessary checks with the queen as this might lead to the widening of the box.
Now let’s understand this with the help of an example.
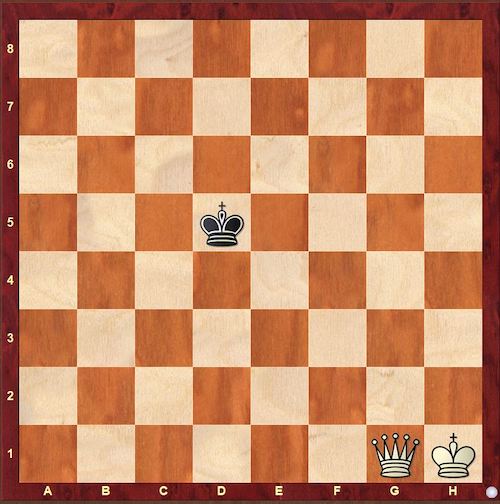
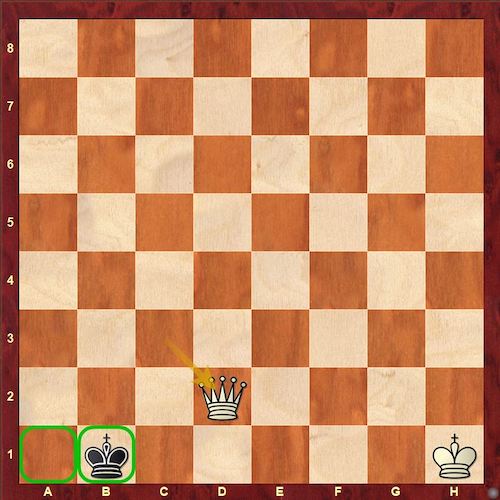
Let’s try to apply the above-mentioned method to the position in diagram–1. First, let’s decide the corner to which we want to drive the Black king to. We can choose the corner to be the top left one (a8) as it is closest to the Black king. The next step is to create a box around the Black king using the queen. For this, we play the move
1.Qe3
We have created a box around the Black king, keeping the top left corner as the corner of the new box, as shown in diagram-2. Now the king cannot escape from this box.
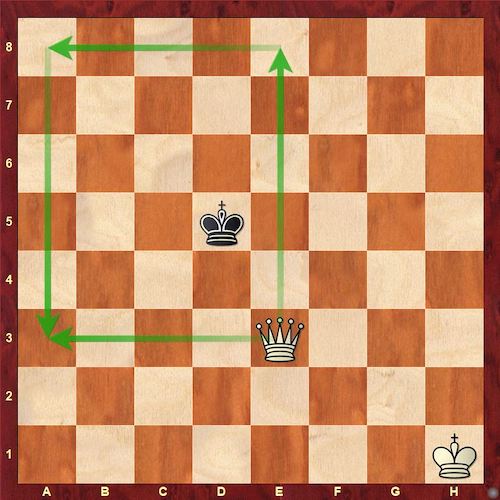
Now black moves to
1…Kc4
Our next step is to ‘shrink the box’. We achieve this by playing the move
2.Qd2
Now the new ‘shrunk box’ is created, keeping the ‘corner’ intact as shown in diagram-3.
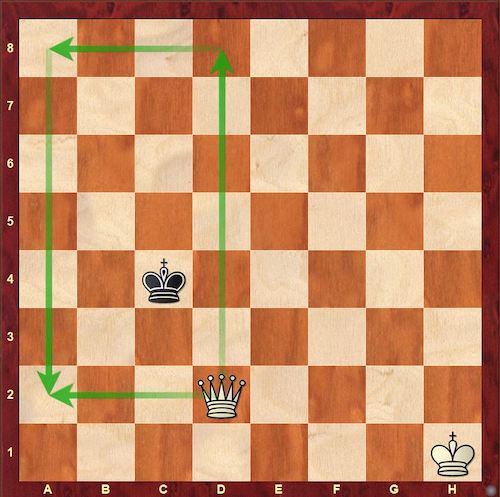
2…Kb3
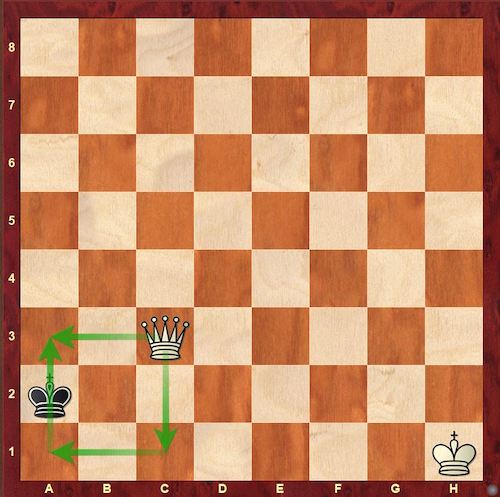
Again by applying the same method, we play
3.Qc1
Now the box is even smaller, as shown in diagram-4.
Note: It must be noted that while ‘shrinking the box’, the queen should move to the closest square possible to the Black king, maintaining the ‘corner’.

3…Ka4
If the black plays Ka2, we can now ‘switch the corner’ (as the Black king is now closer to the bottom left corner) by playing the move 4.Qc3 as shown in diagram-5 and after 4…Kb1 play 5.Qd2 leaving the Black king with only two squares to move to (diagram-6), thereby ending the ‘shrinking’ process.
4.Qb2
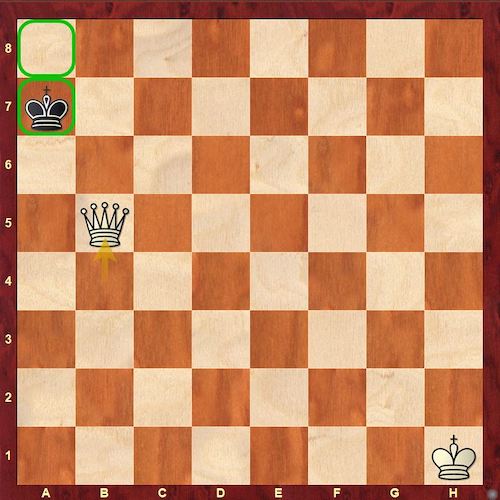
Now the king is restricted to a single file. White will continue this ‘shrinking’ process till the point where the Black king has only two squares to move to.
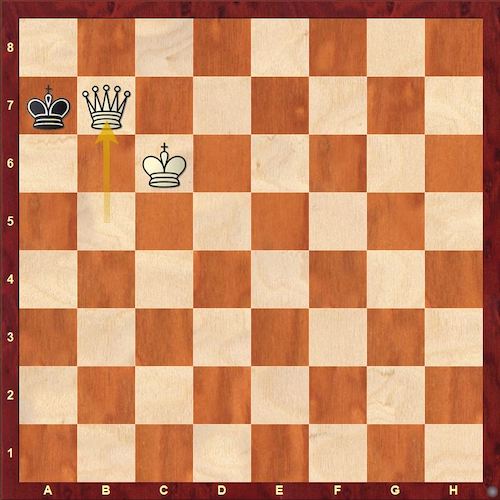
4…Ka5 5.Qb3 Ka6 6.Qb4 Ka7 7.Qb5 Now, the Black king has only two squares to move two as shown in diagram-7.
7…Ka8
Now it’s time to bring the White king into the action.
Note: 8.Qb6 is a blunder as the position becomes a stalemate then.
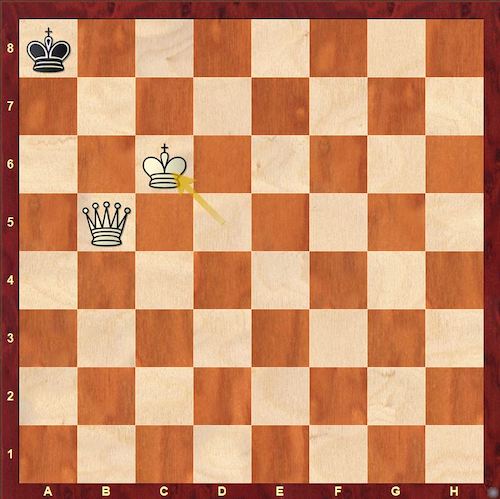
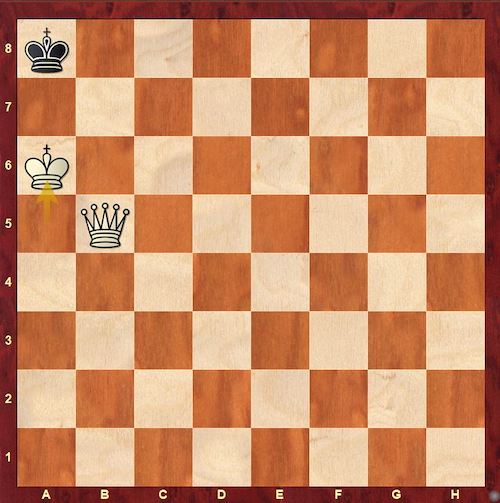
8.Kg2 Ka7 9.Kf3 Ka8 10.Ke4 Ka7 11.Kd5 Ka8 12.Kc6 The king has reached the optimal square for mating the Black king. Notice how the file in which the queen is on is between the files where the kings are on (diagram-8). This is very important since, if the White king tries to come to the a6 square (both kings on the same file) instead of the c6 square (both kings on the files on either side of the queen’s file), then the position will be a stalemate as shown in diagram-9.
12…Ka7, and we deliver the final checkmating move
13.Qb7# (diagram-10)
1–0
As you saw, the method was rather simple and easy to execute. This is a general method that can be applied to any position, with the queen and the other side having just the king.
Conclusion
The elementary checkmate discussed above is a most basic and necessary one for the improving game of the player. The methods explained are simple and easy to learn, and studying them will earn you many points.
To learn more about chess moves and strategies, attend our online classes by signing up here.